


All our eSIMs have an automatic Access Point Name (APN) so manual programming is not necessary. However, if you do want to check or manually configure the APN, follow the steps below.
Setting Up the APN
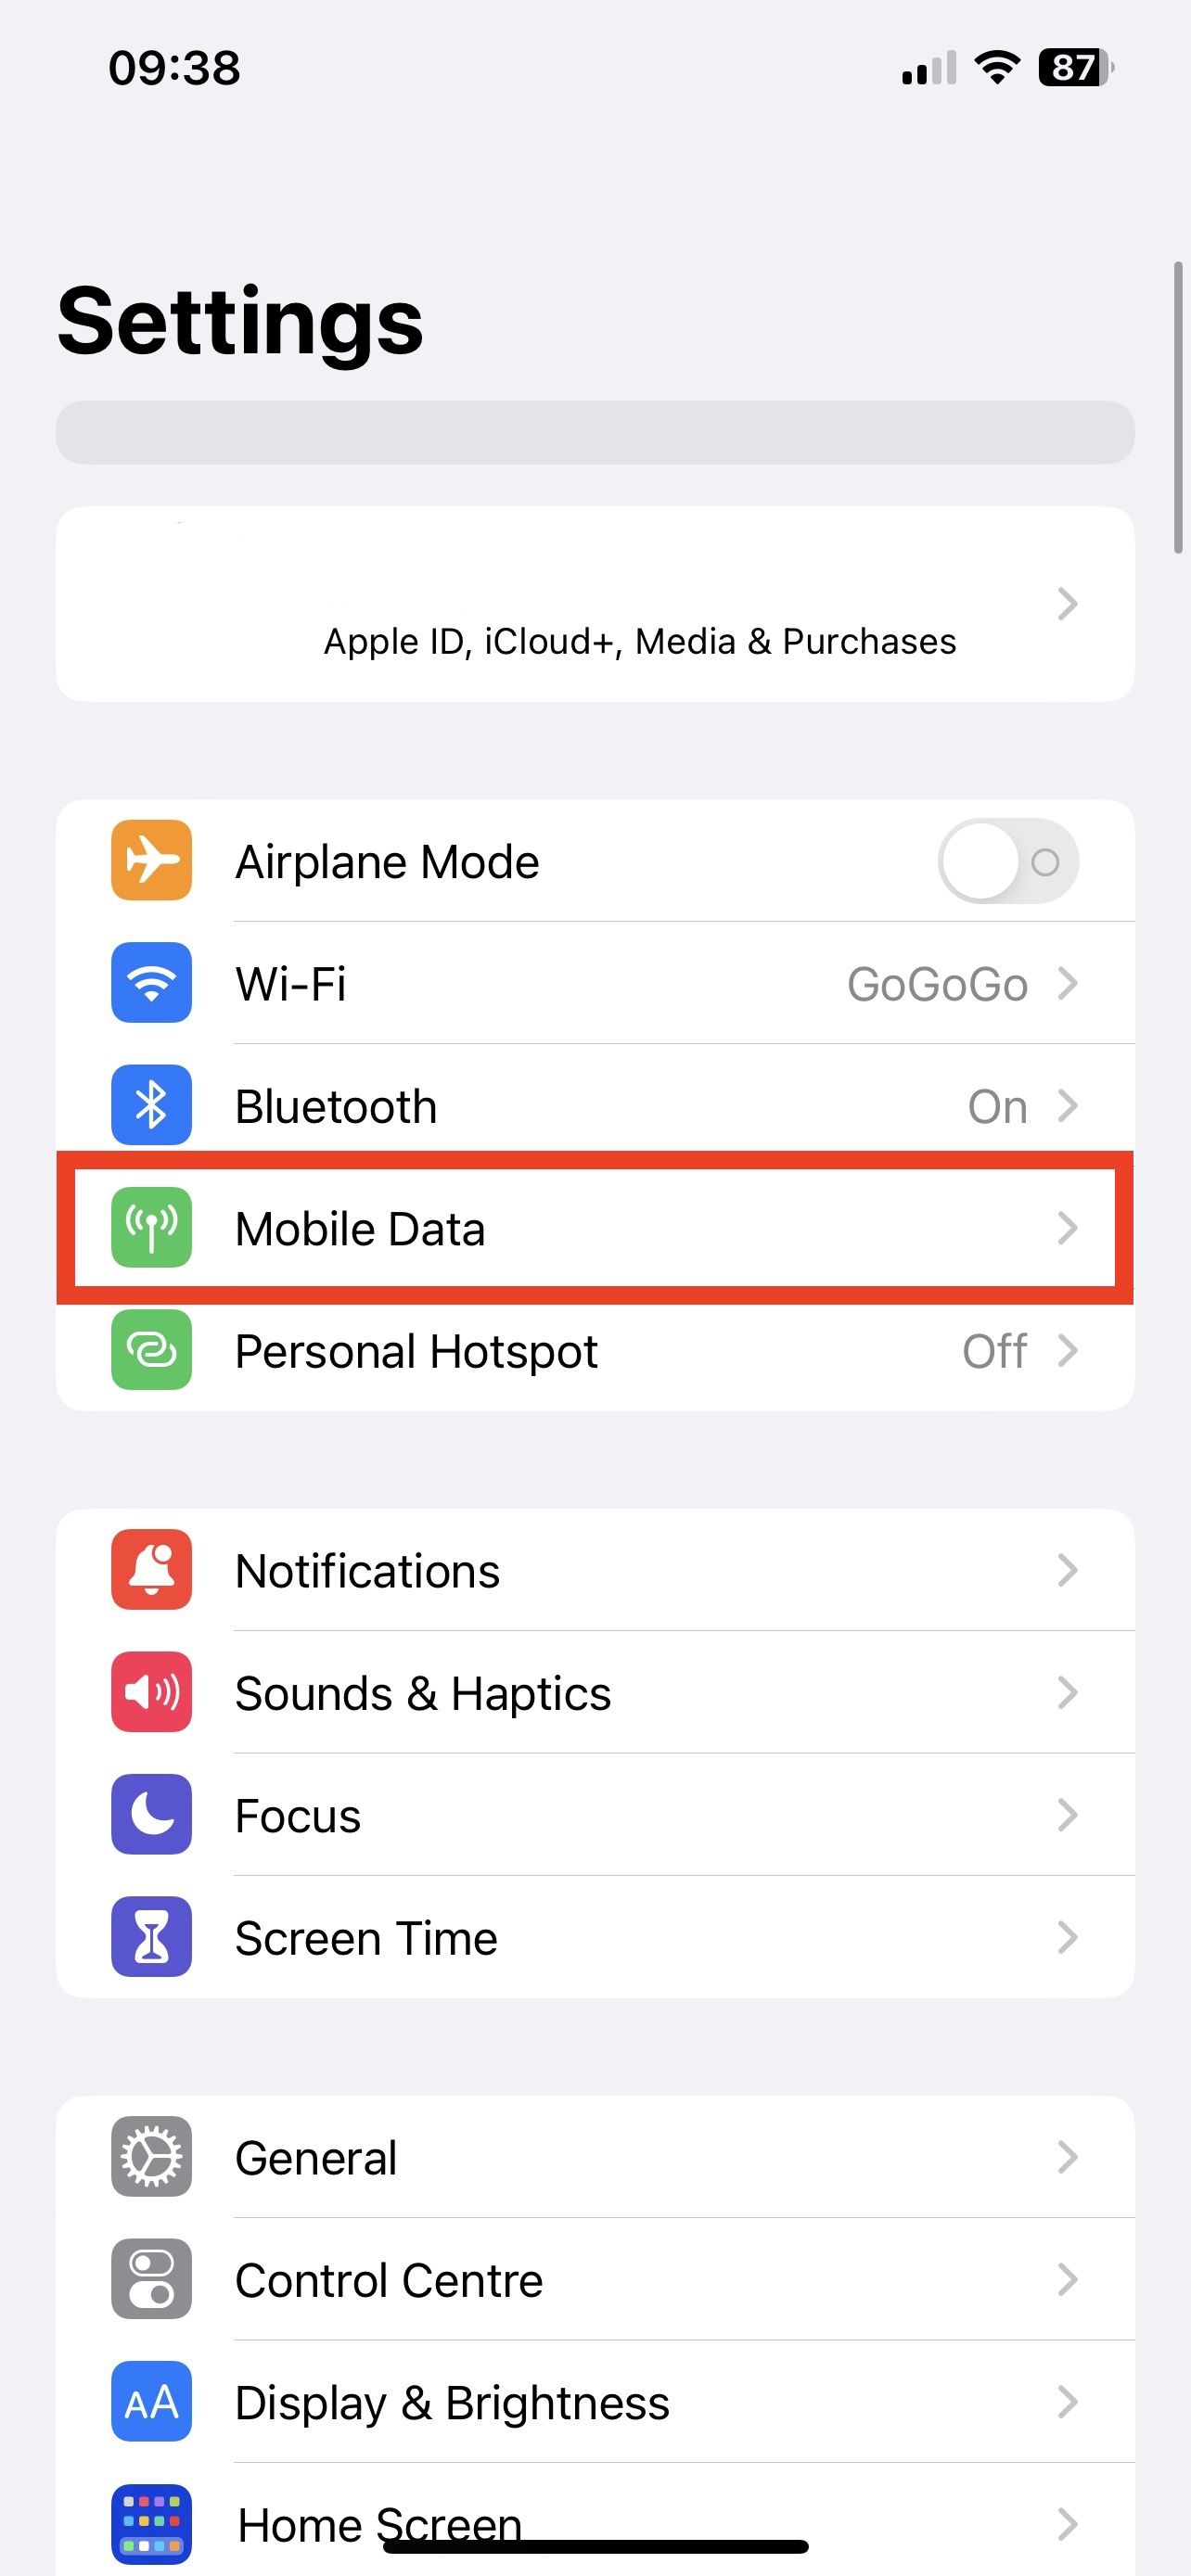
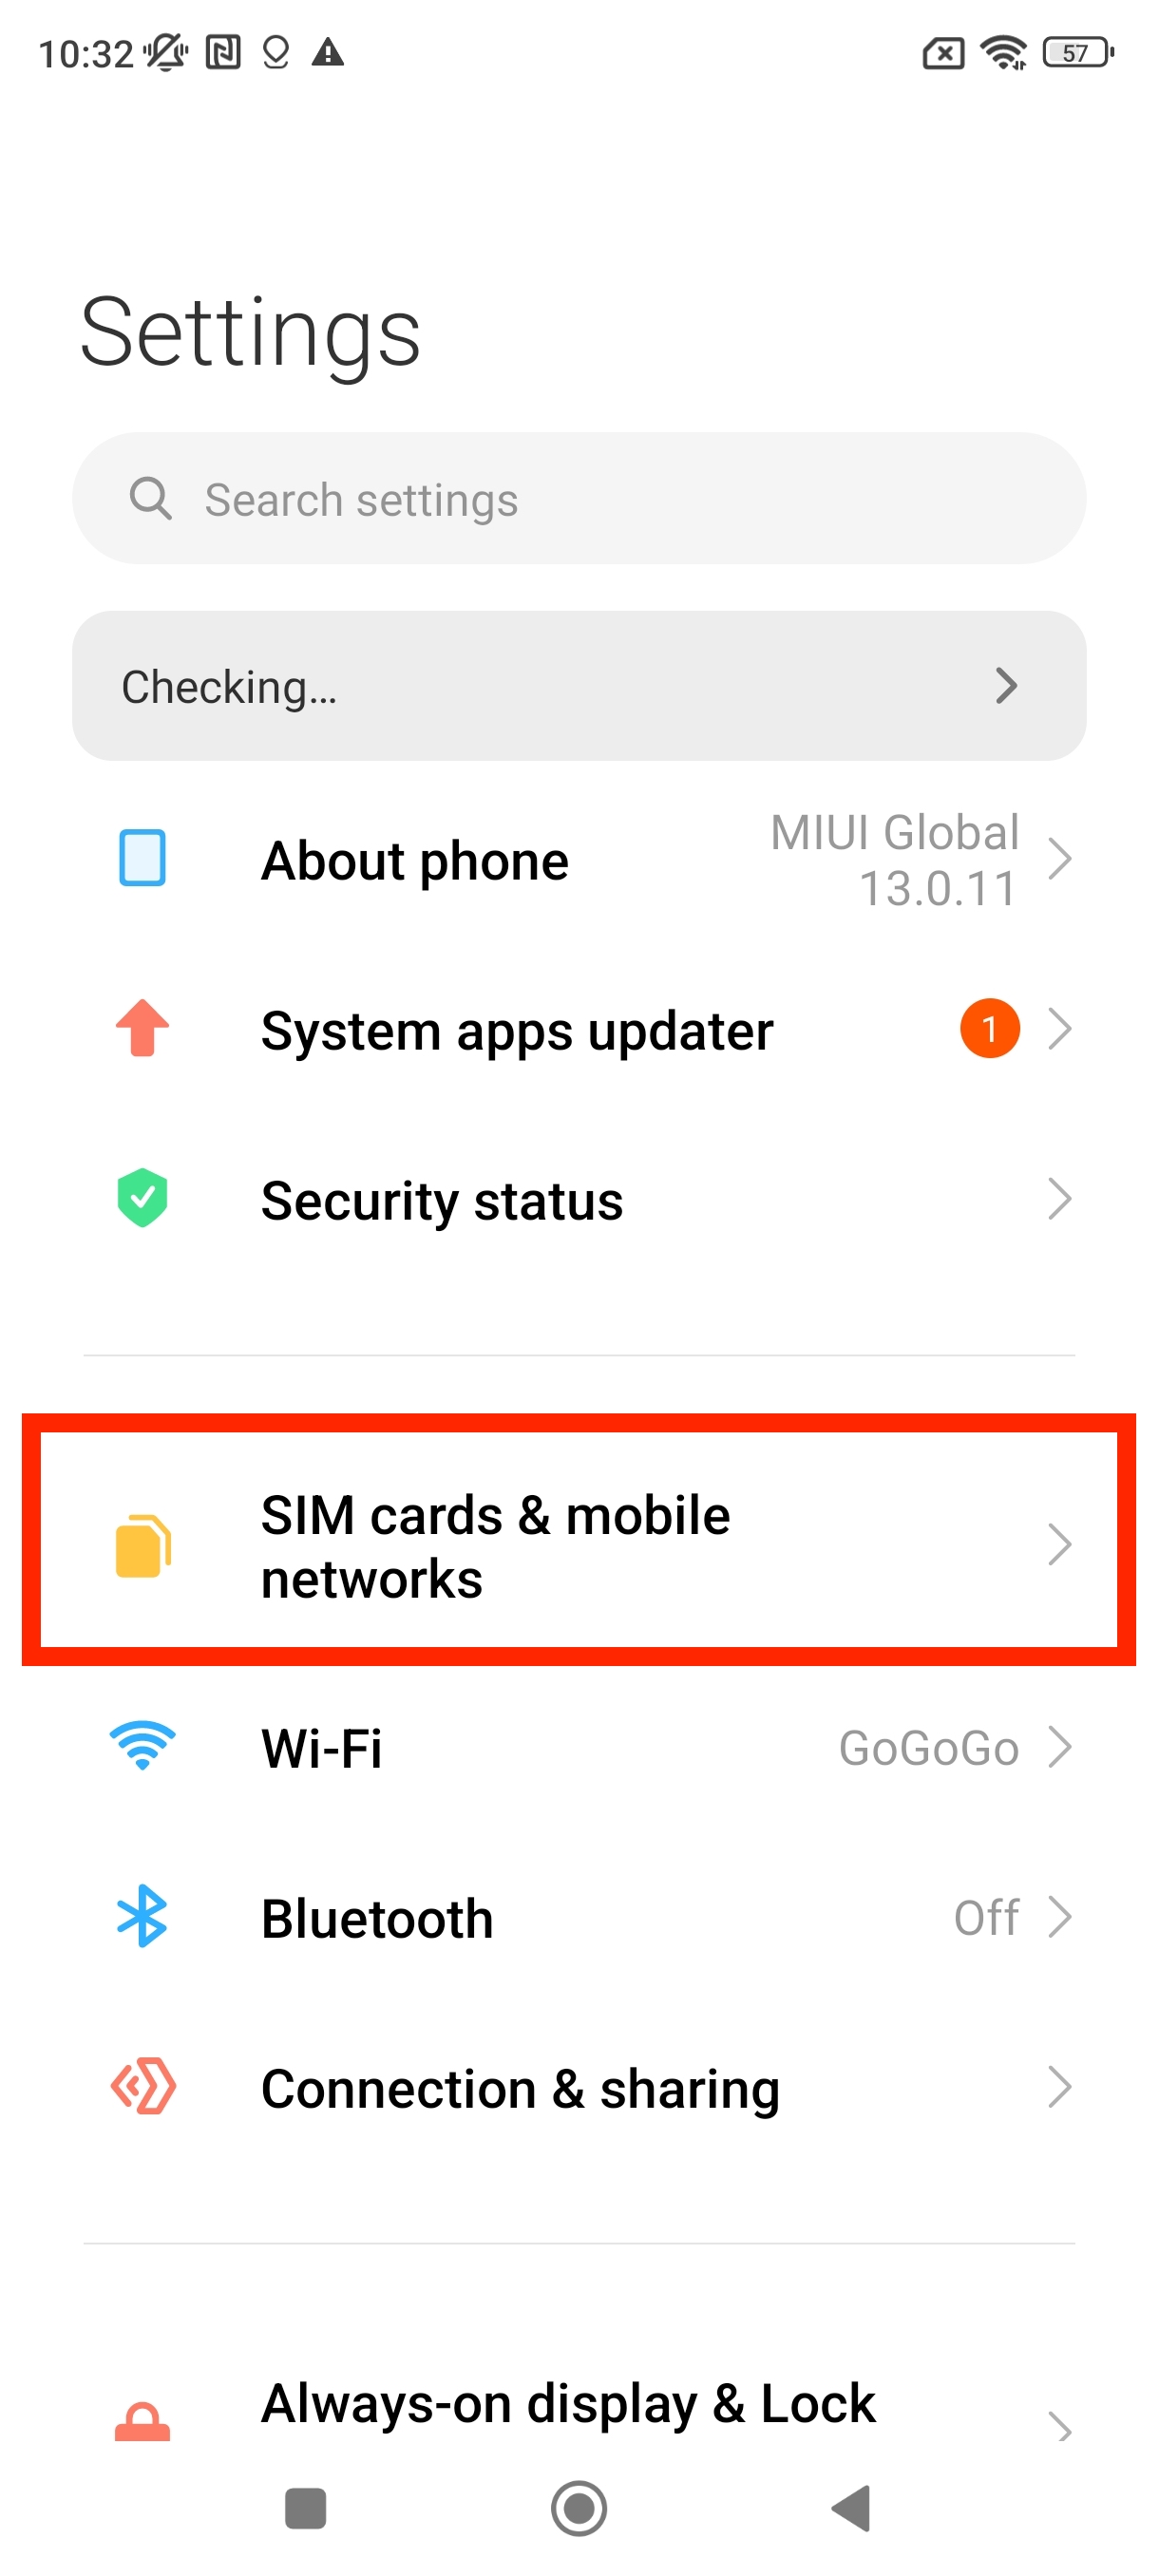
1. Go to Settings. Tap on Mobile Data or Cellular Data.
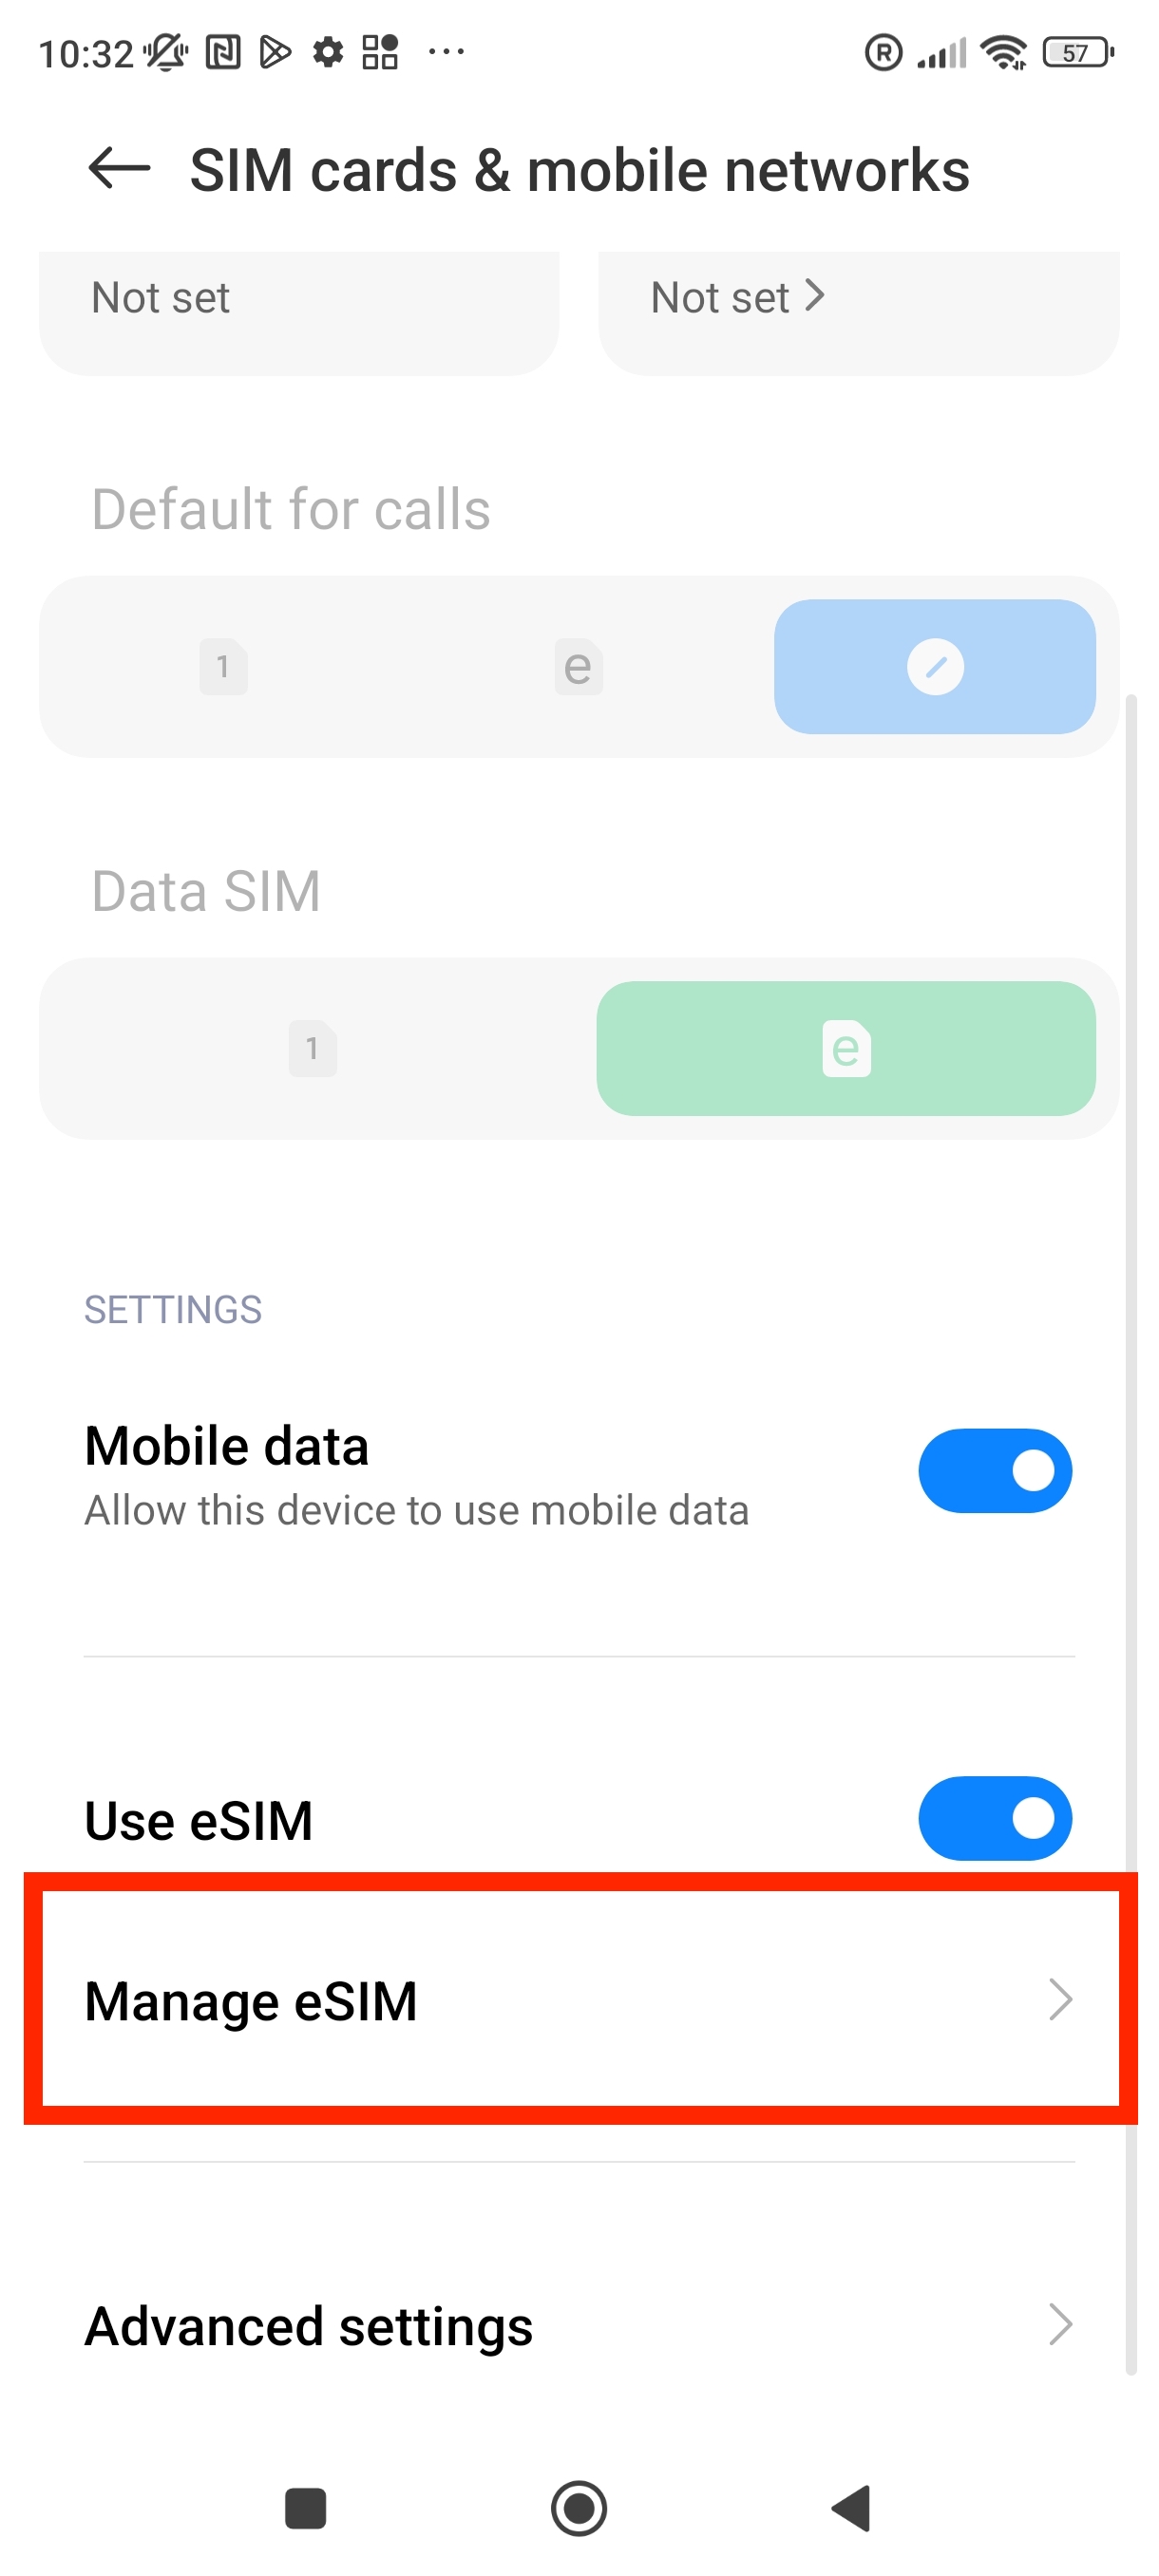
2. Under SIMs select your eSIM.
3. Tap Mobile Data or Cellular Data Network.
4. In the Mobile / Cellular Data APN field, type bicsapn. Note: You may leave the other fields blank.
This APN is required to use our data roaming services. Please ensure it is configured as shown.